HP-03: Meshtastic and Solar Power
Preface #
This is the third article in my series “Hobby Programming”.
Intro #
I heard about Meshtastic every couple months for the past couple of years. It is an open source project that aims to create a secure off-grid mesh network, and it relies on LoRa. As per Semtech’s website, LoRa is a spread spectrum wide area network platform designed for IoT applications. LoRa lends itself well to low power devices that may be operating in noisy environments, such as the modern urban radio environment. Meshtastic effectively can act as an entryway to amateur radio, as LoRa operates in the ISM band.
ISM Band Briefing #
The ISM bands are sections of the radio spectrum that have been designated to be easily accessible for use. In the US transmission of radio signals between 9 kHz up through 300 GHz require licensing through the FCC. There are many kinds of licenses that grant permissions to different types of radios, frequencies, transmission modes, and security features. There are licenses for marine, aviation, business, many kinds of broadcasting, and amateur usage, just to name a few. In general, licensing is a long, expensive, and/or challenging process. This poses a problem for general consumers, especially in the modern day where people use devices that transmit radio signals without giving it a moment of thought. For a long time now, the FCC has been aware that consumers may wish to be able to transmit radio signals, and they have designated specific bands for consumer use. For example, the CB, FRS, and ISM bands all are made available for consumers. These bands often come with significant restrictions, so that they cannot be used outside of their intended purposes.
Likely the most popular of these are the Industrial Scientific, and Medical (ISM) bands. These are several bands including bands around 433 MHz, 915 MHz, 2.4 GHz, and 5.8 GHz. Two of the most notable users of these bands are WiFi and Bluetooth, which use the 2.4 GHz and 5.8 GHz bands. In fact, the device that originally started the discussion for ISM bands was the Microwave, which also operates around 2.4 GHz. Devices such as toys or remote weather stations often use the 433 MHz or 915 MHz bands. LoRa also operates in the 915 MHz ISM band, meaning that a consumer does not need to acquire a license to be able to get onto the network.
Starting out with Meshtastic #
I started with Meshtastic about a month ago by purchasing 2 Heltec V3 modules from Amazon. These cheap modules can be found on Amazon with a variety of accessories for about $20-$30. They seemed to be recommended fairly frequently for their cheap cost for an all-in-one solution, although their ESP32 CPU was criticized for high power draw compared to the NRF52 in other Meshtastic nodes. I got mine without batteries or a case, as I figured I could power them over USB or for the time being and I could just 3D print a case myself.
After flashing new firmware to the device using the web flasher, I let it sit near a window on USB power overnight while I printed up a case. First, I looked for if I had a battery on hand that I could use to power them. I found a USB battery bank like this one which uses a single 18650. The 3.7V battery would work perfectly with the Heltec V3 module, so then I looked for a case that would hold both of them. I started with this case from Marigu on Printables, which worked alright. I have been using a 0.6 mm nozzle on my modded Ender 3 for a while now, and the buttons on this case didn’t really separate from the body, so I had to do some destructive post processing to make at least the program button on the Heltec V3 accessible. This problem could also have been from the filament I used which has been sitting in ~50% humidity for > 1 year, but that is a project for another time. I did really like how this case has a good 18650 holder and spots for metal tabs to contact the battery terminals. The 18650 I used gave me good battery life, although I have generally left it plugged in. I think that it can last for about 18 hours on battery power.
![The case is pictured here, without the Heltec V3 installed]
Initially, I didn’t get very promising results. I only saw a couple nodes overnight, so I decided to see if I was doing something wrong. I looked to see if there was any online discussion of Meshtastic in the DMV area and I found an online community for Meshtastic in NOVA, and they even have a getting started guide, Perfect! As it turns out, they decided to switch away from the default LoRa channel channel 20, in favor of channel 9. After reflashing the Heletec and setting the LoRa channel to 9, as well as enabling “OK to MQTT”, as suggested in the getting started guide, I immediately started seeing nodes show up!
Eventually, I decided to switch to a different case that would have functional buttons. I chose this case from TonyG on Printables which seems pretty popular. After specing out the options I wanted, I printed it up in some brown and silver PLA. With some mild post-processing, I was able to get it to fit well and bolt together. This case does not have clips to hold the 18650 like the other one, so I packed the inside with some foam, from the box the Heltec V3 came in as well as some of the kind that IC’s are shipped in. This gave a sturdy device that was more compact and felt pretty solid. After leaving it overnight, it showed 35-65 nodes currently online at any given time, and at time of writing has seen a total of 163 nodes.
On antennas #
I started by using the basic “internal” antenna because it was the easiest to install.
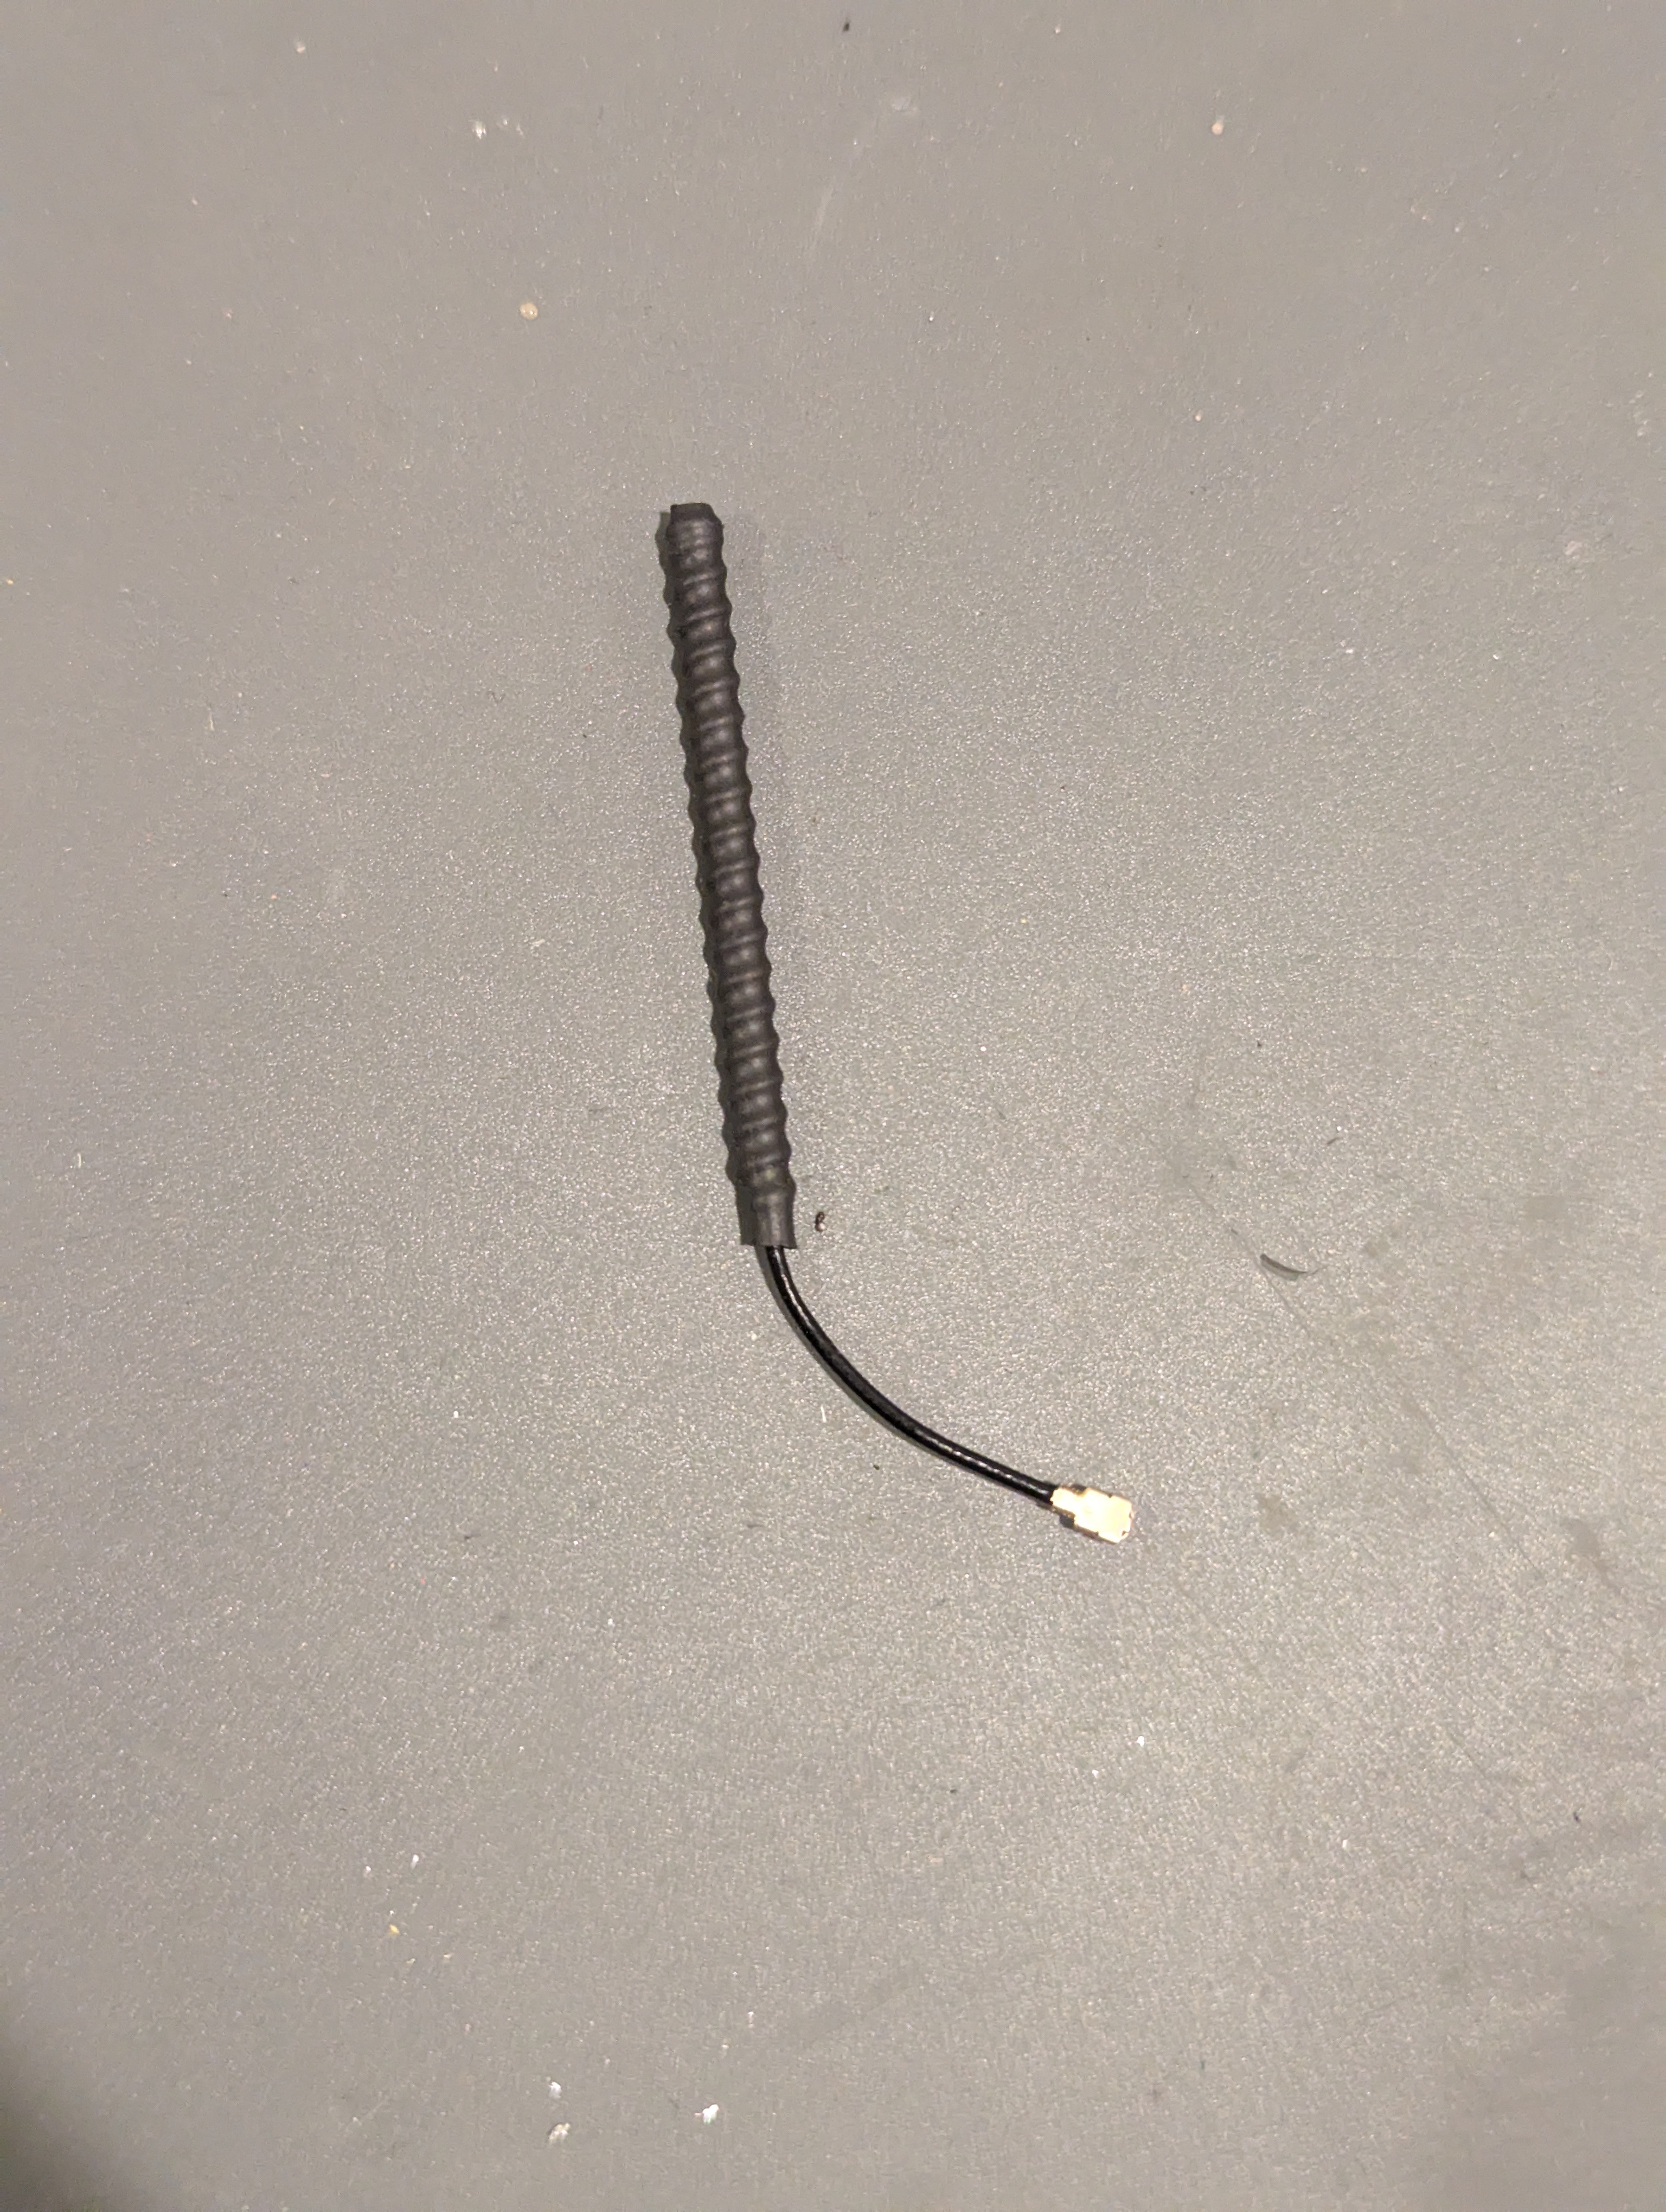
Eventually I switched to using an external antenna using the pigtail SMA connector provided with the Heltec. Switching allowed me to use the stock external antenna, a third party antenna which may have better characteristics, or even create my own antenna.
Pretty quickly, I was drawn to the prospect of creating and tuning my own antenna. I found Andreas Spiess’ video on building antennas with a NanoVNA very helpful, and ultimately fell down a rabbit hole on his channel. I followed along to create a ground plane antenna tuned to 905 MHz, as LoRa channel 9 runs at 904.125 MHz and channel 20 is at 906.875. I thought it was pretty incredible that by just bending down the radials, the impedance of the antenna changes drastically.
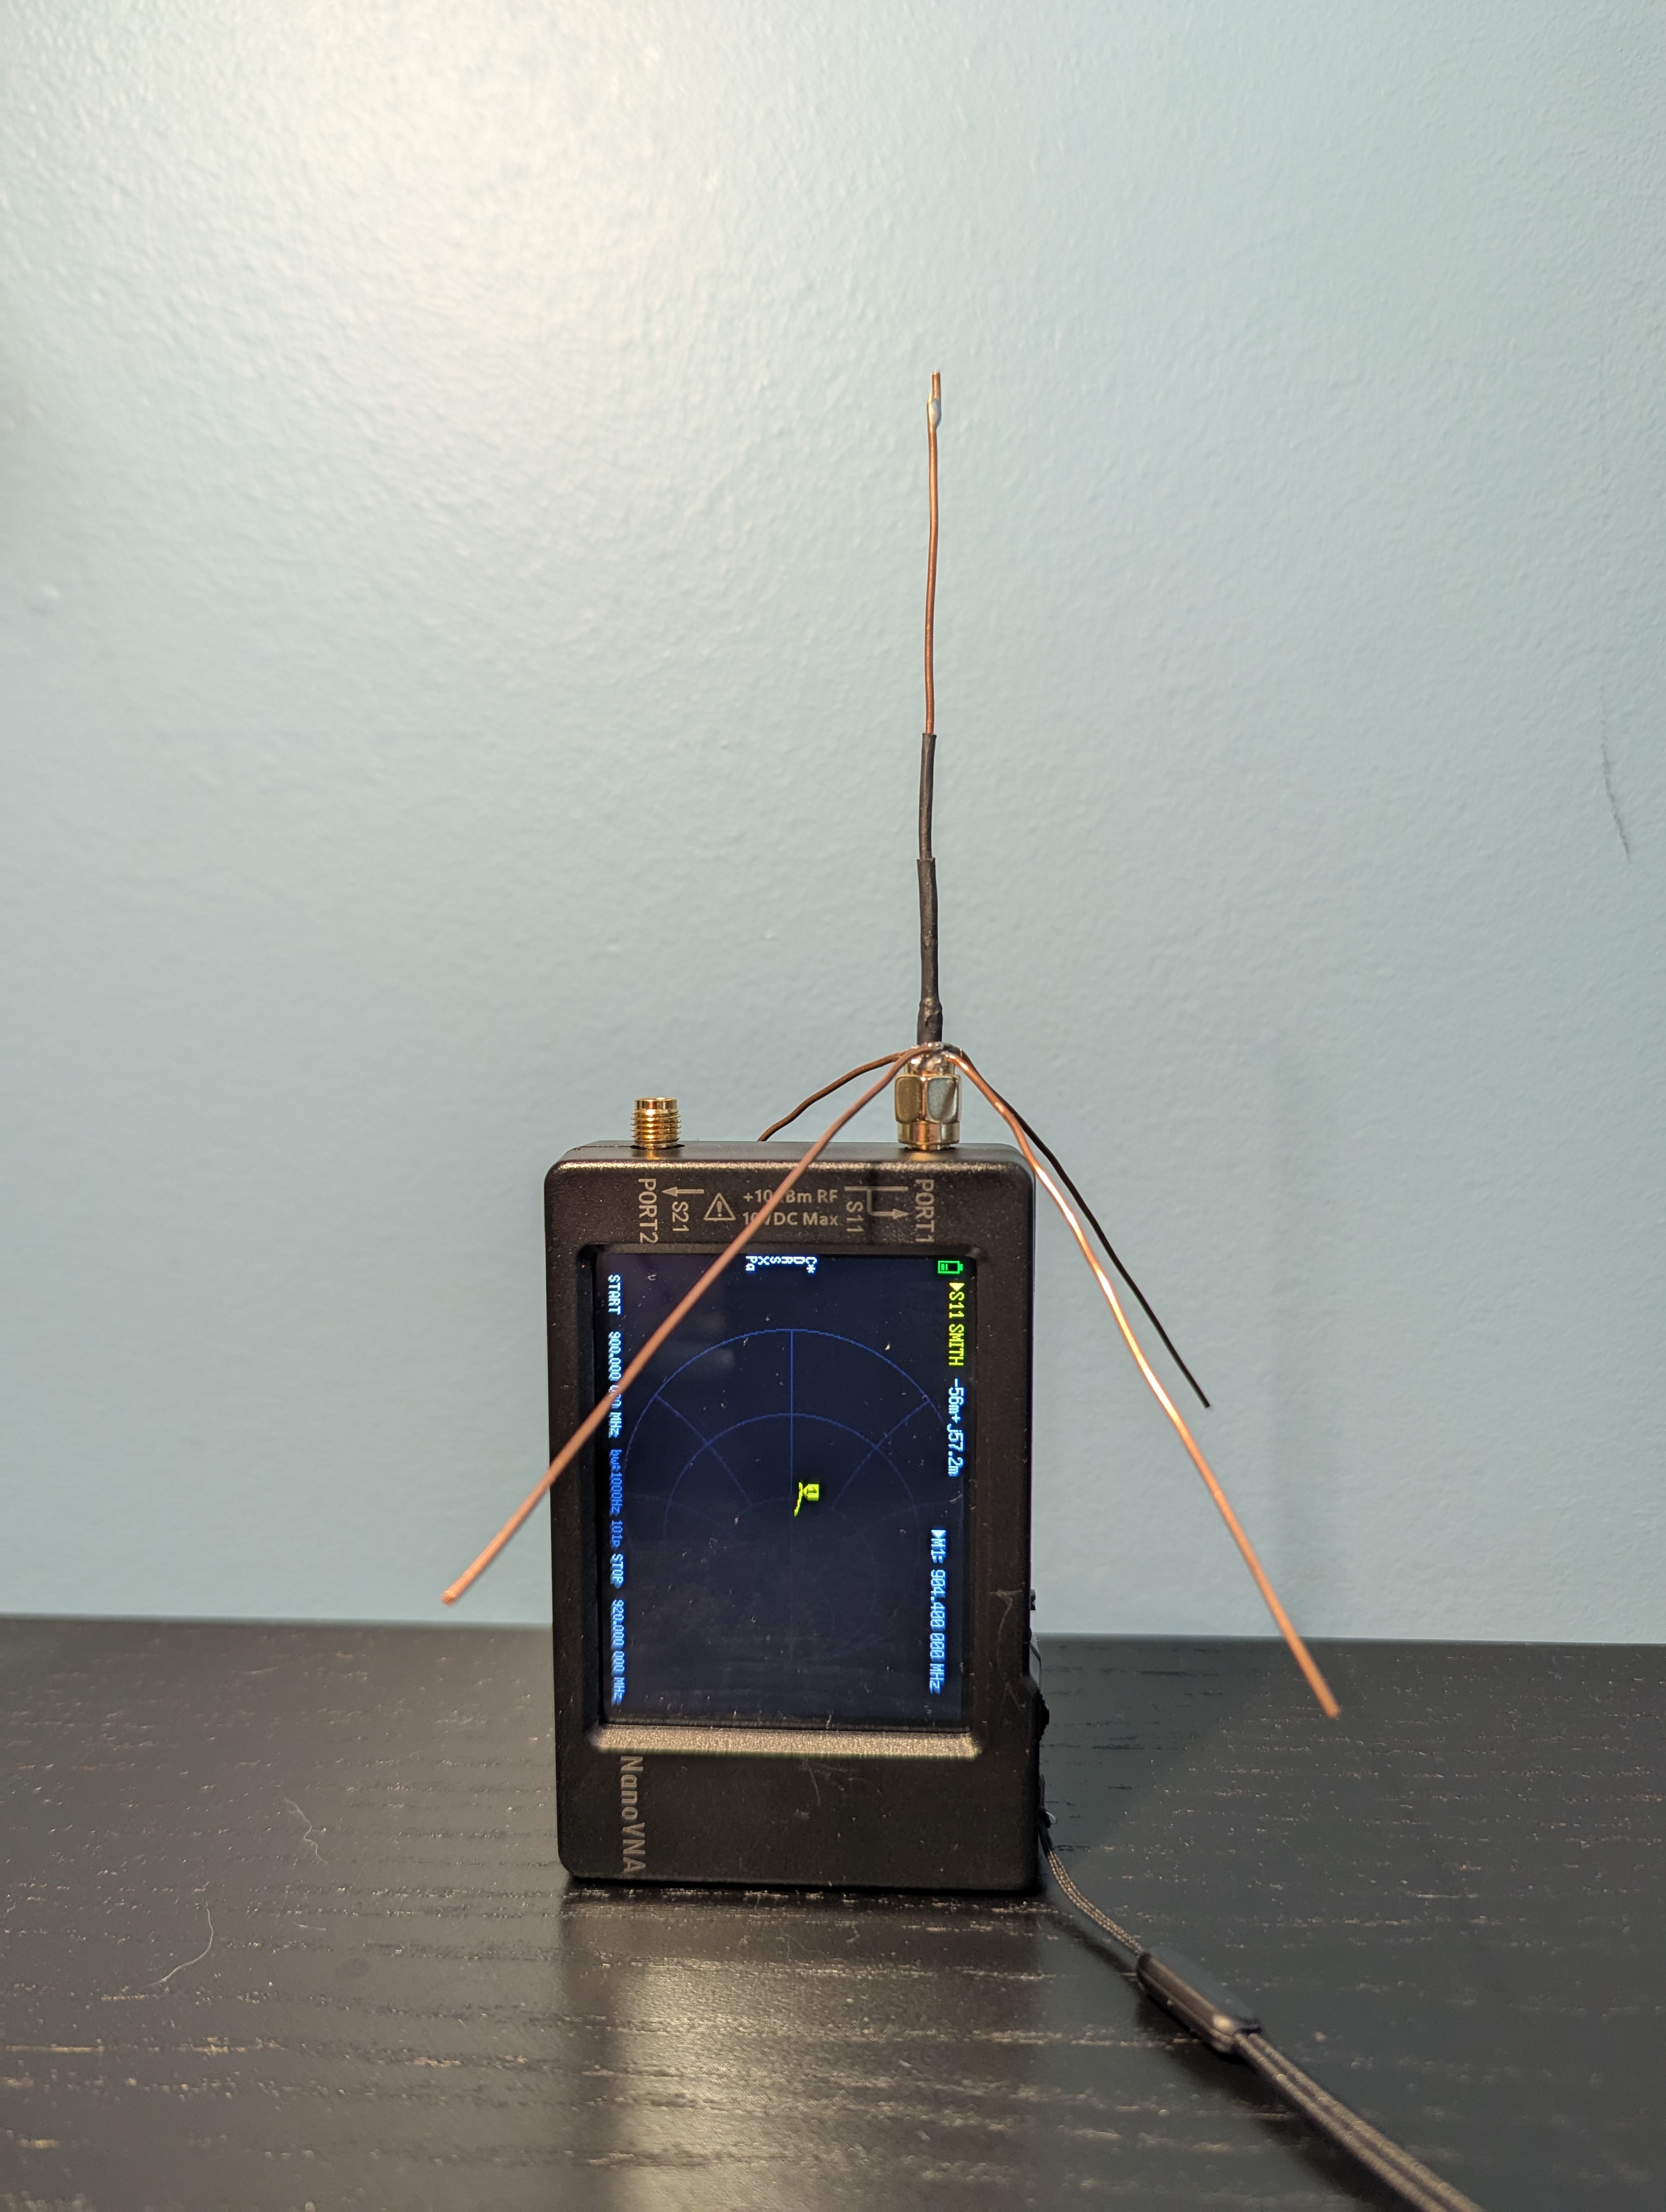
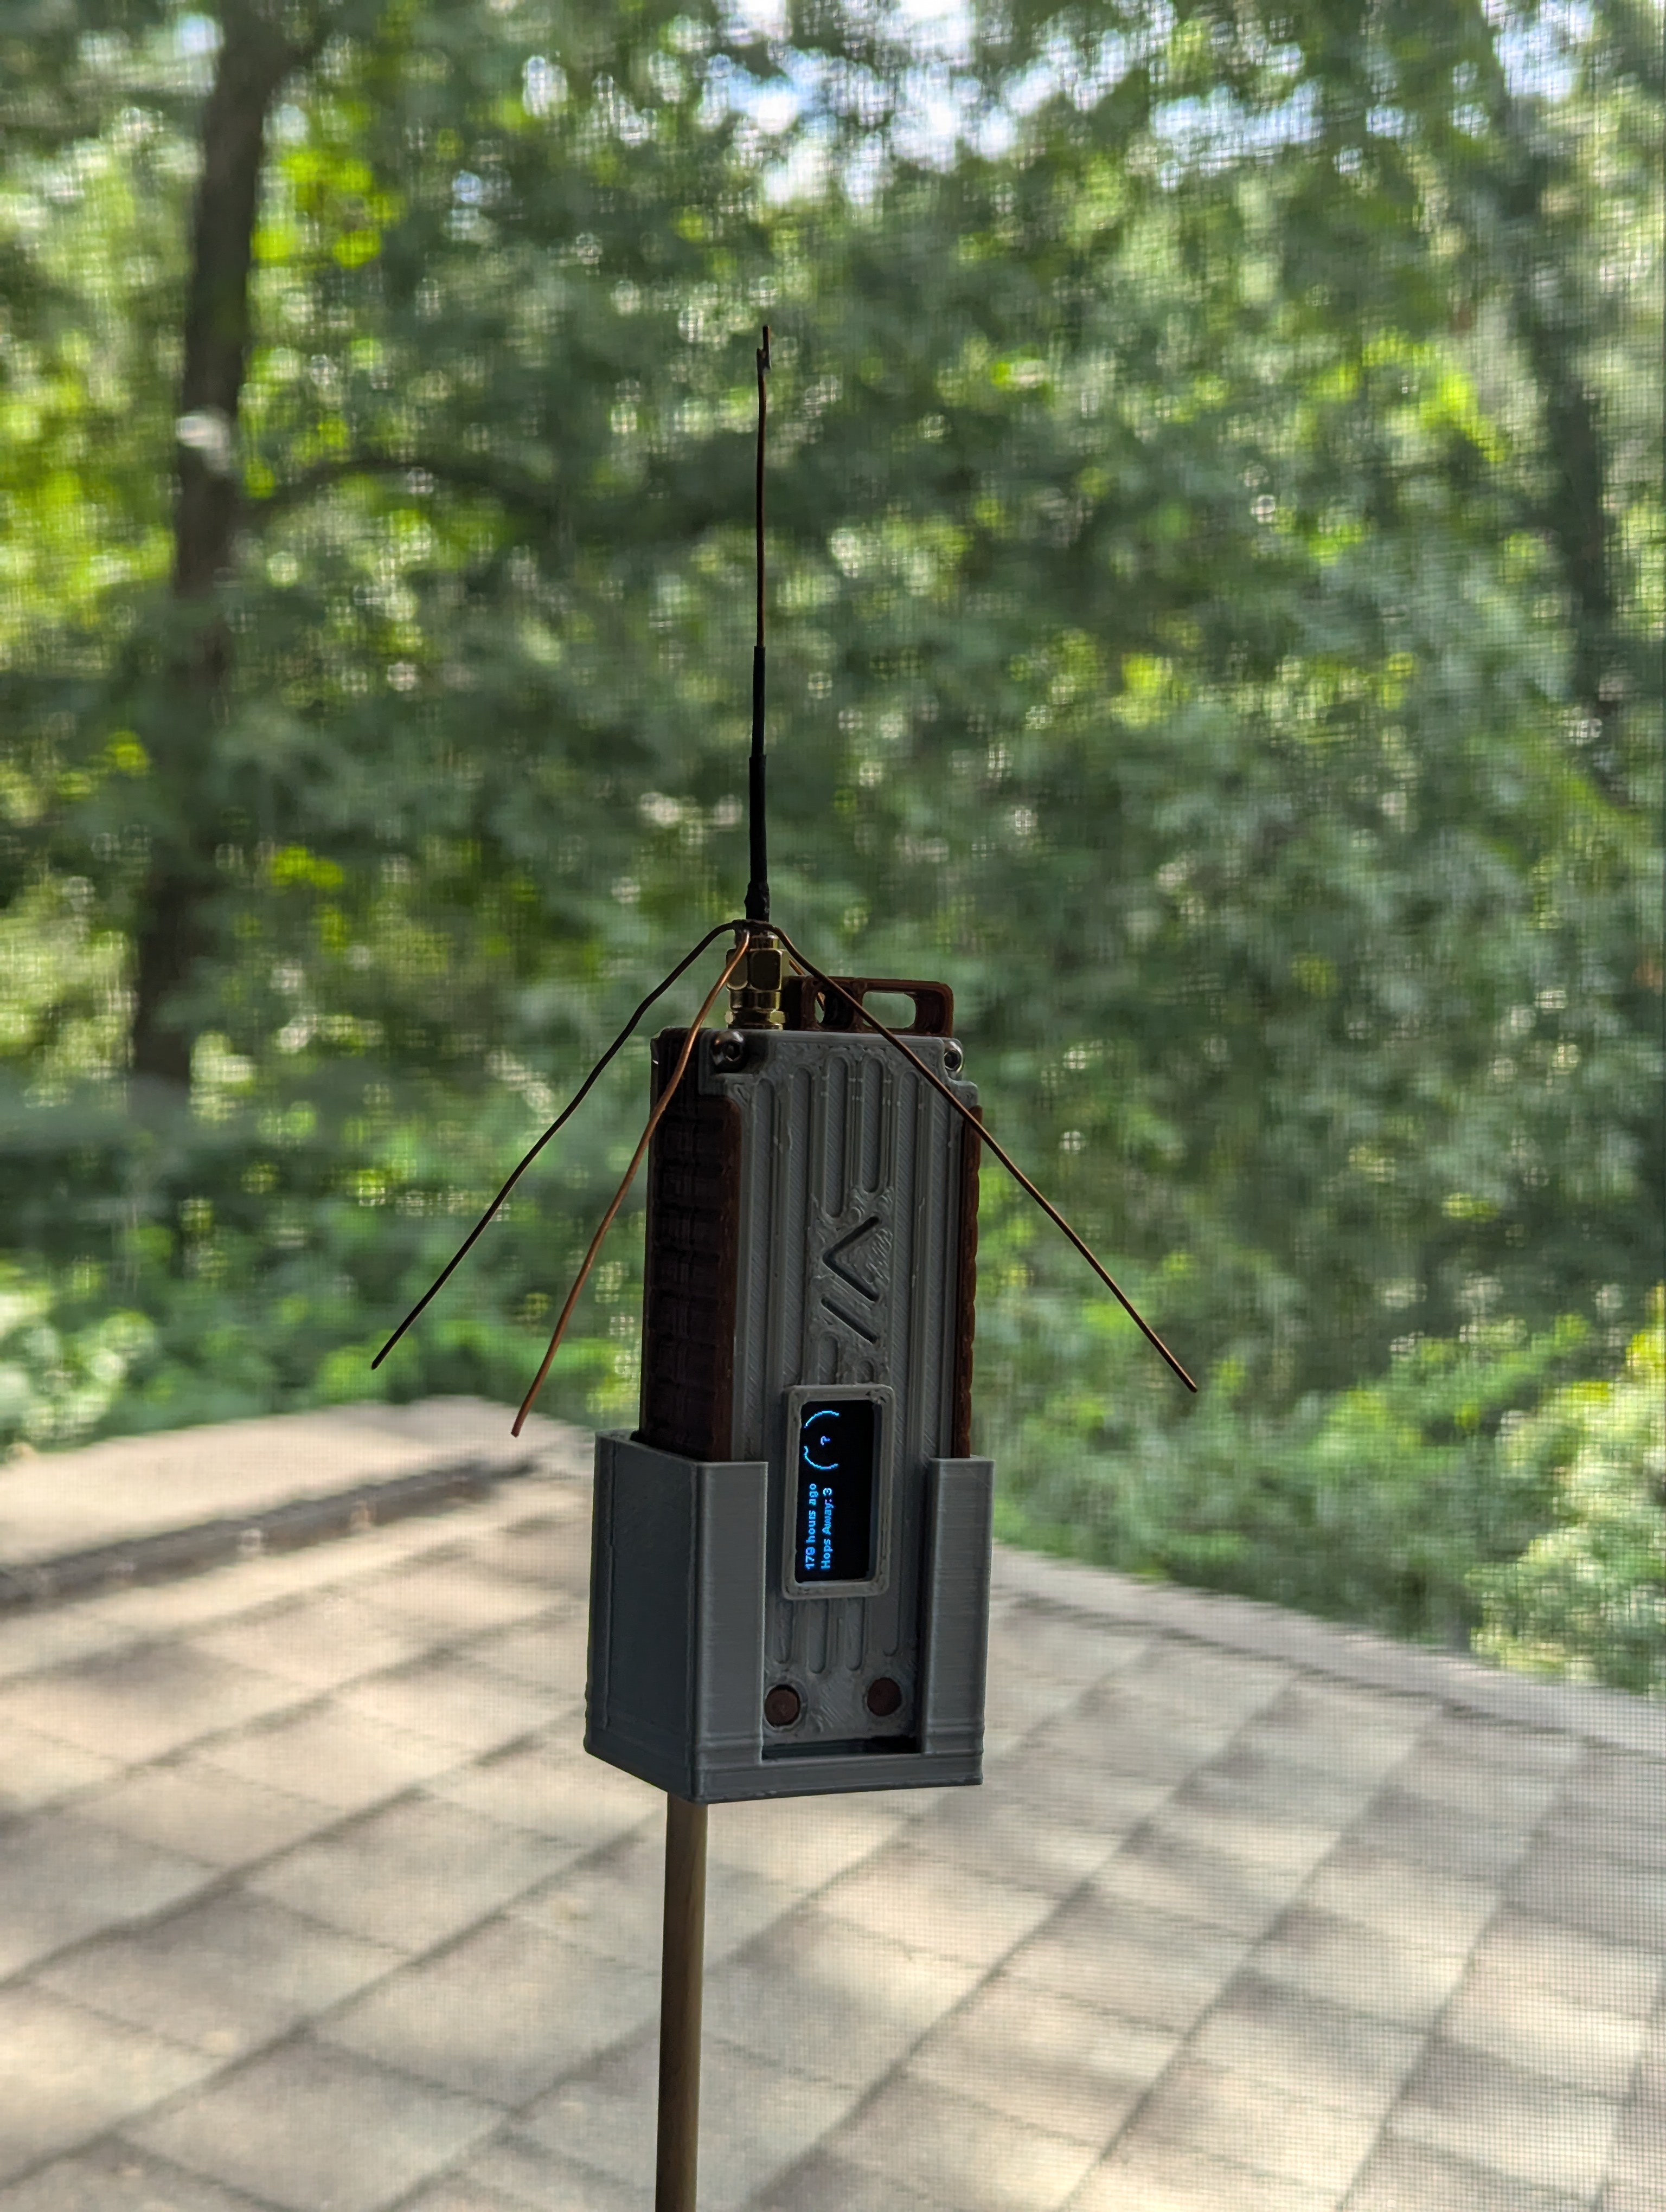
I had to add a small bit of wire to lengthen the antenna but after carefully tuning the antenna I was able to achieve a very nearly 1:1 impedance match. With the new antenna I was able to pick up a couple of nodes over a direct connection even from inside by putting the device by a window. I also mounted it on a dowel using a custom 3D printed stand, to help isolate it and raise it off of the ground. Using this improved antenna gave me better connection to ~4 nodes which I have direct connection to.
A solar powered node #
I decided to use the second Heltec V3 to experiment with possible long-term outdoor, off grid setups. My first thought was to use a 12V RC LiPo battery, hoping that it would give the node a long battery life. I was able to power the node from the battery using an adjustable buck converter to power the node over USB. However, I didn’t like that I couldn’t monitor the actual voltage in the 12 V battery. Using an adjustable power supply, I could tell that the buck converter would output 5 V as long as the input voltage was at least about 6 volts. This would mean that I would be unable to monitor the voltage in the battery. Eventually, I found that Meshtastic supports a variety of I2C sensors, including voltage and current sensors, but I did not decide to go this route.
Instead I decided to use a small solar panel I had in conjunction with a LiPo charger module and a small pouch-style 150 mAh battery. It was challenging to find hard numbers for the power draw of the Heltec V3, but after looking around I decided that 150 mA was probably reasonable for estimation purposes. Given that the small battery could power the Heltec V3 for about an hour and a half, I thought it would be fine for this application.
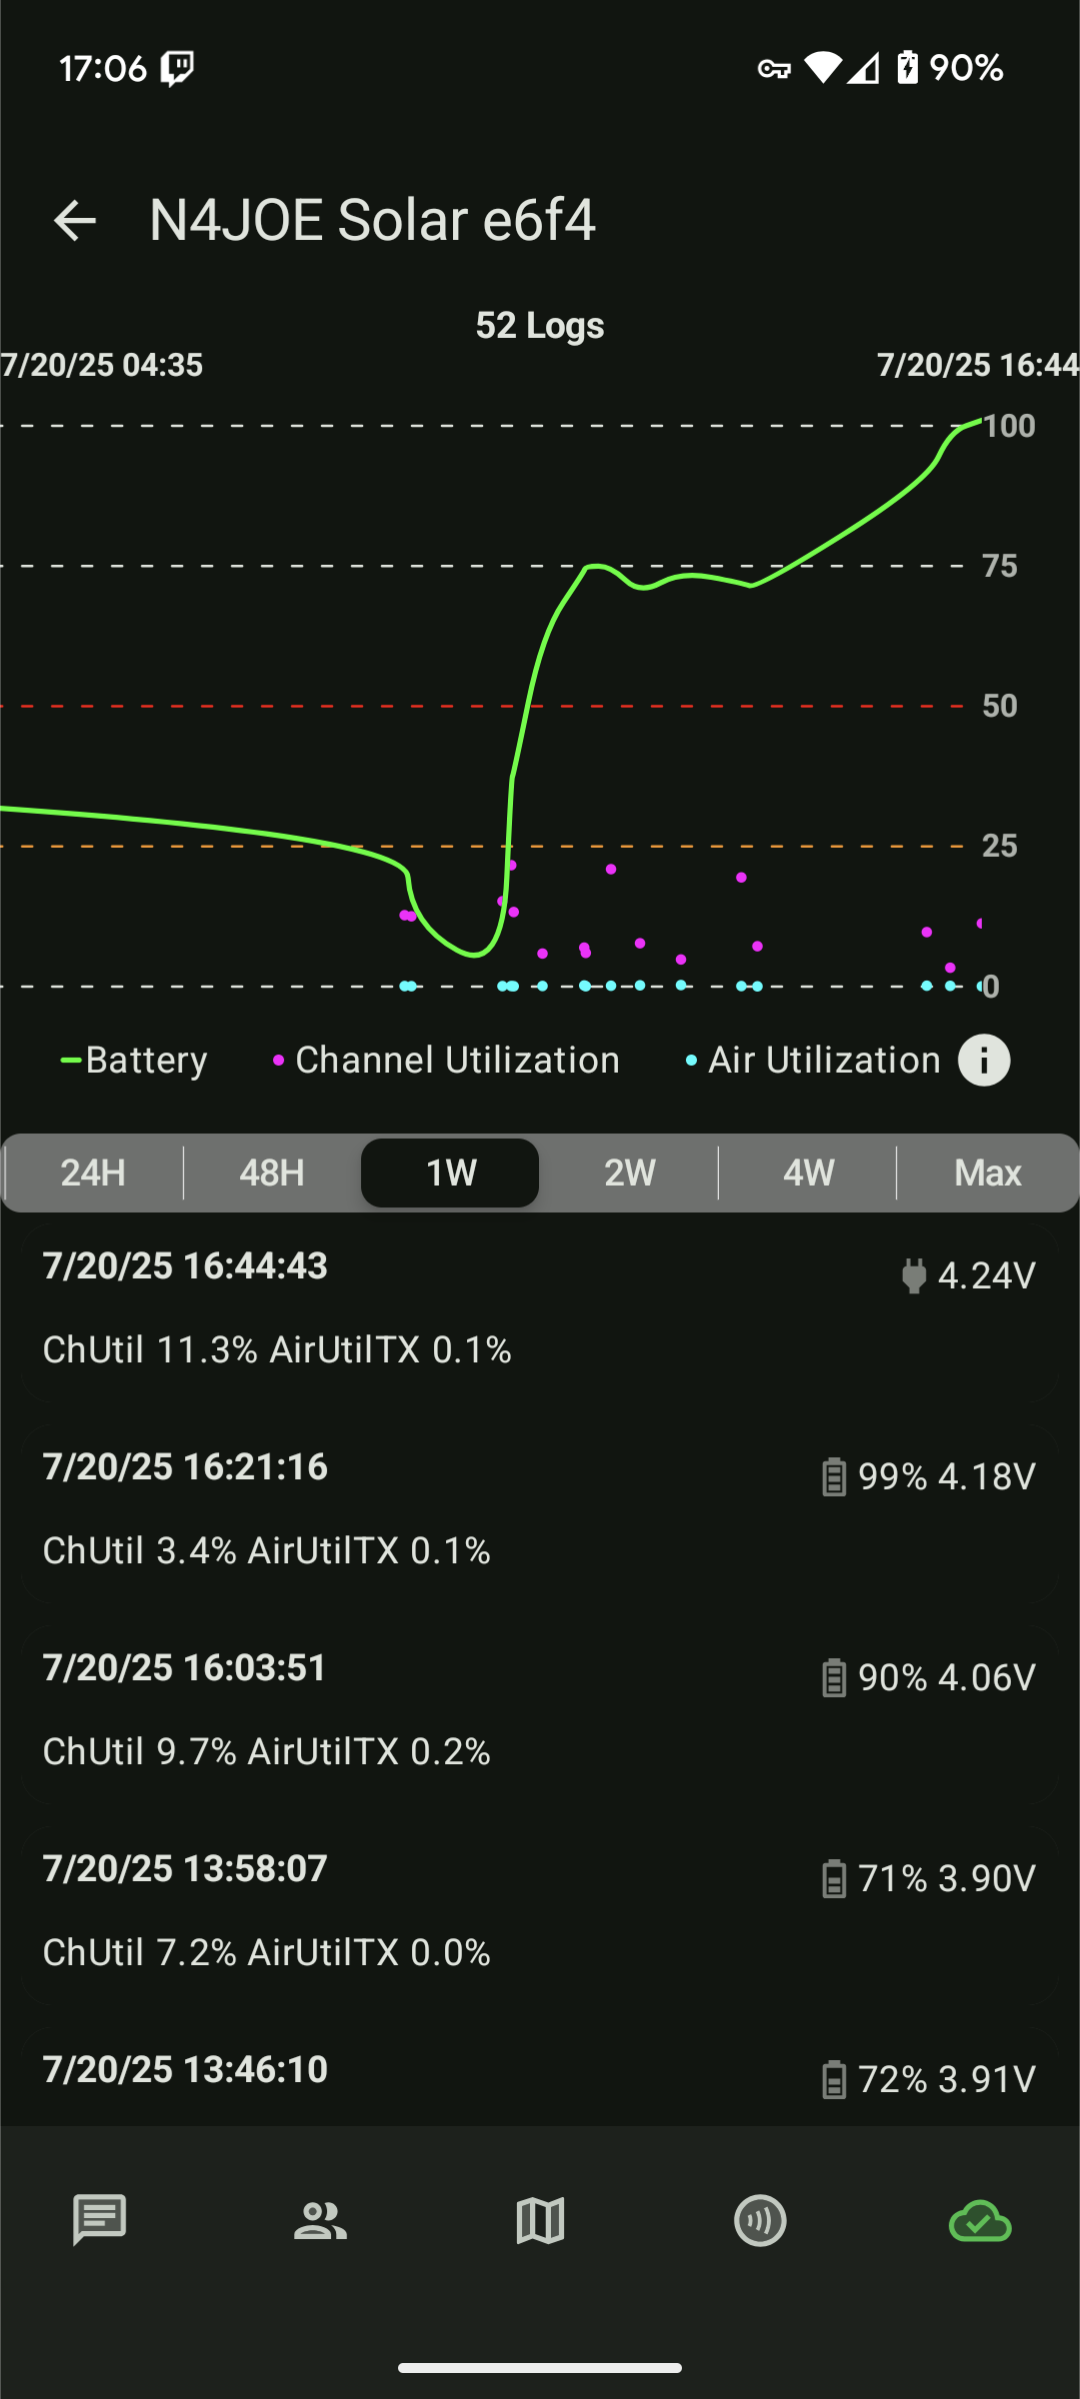
To help make the battery last longer, I tried to save power by changing various settings in the app. The first thing to disable was Bluetooth, as it was often cited as one of the biggest power draws on the ESP32. But in order to do this, I first had to setup remote administration so I could still control the node. I added the pubic key of my primary node to the Admin section of the secondary node, and I was able to remotely change settings. In the telemetry settings, I set the node to report device statistics every 30 minutes, so that I could watch the voltage change over time. I also set the device to use a fixed position, and to only send out position broadcasts every couple of hours, as it will be stationary, but I wanted to let other nodes have a chance of finding it.
The solar panel I used is one a “flexible amorphous silicon” style one. Again, this is just a panel that I have had lying around for a number of years, but from looking online it looks like they are marketed to output 1 watt of power at about 6 V. From my testing it reached about 4.0 to 4.5 volts inside the case, which in full sun could be enough to fully charge the battery. It also seemed that these panels are marketed for good shade performance, and I think I saw that pretty well. Even when the panel was shielded by clouds or some shade, it could output something in the neighborhood of 3.4 volts, which is enough to power the Heltec V3, although it might not charge the battery super well.
Initially, I repurposed this little LTC4050-based USB LiPo charger from Adafruit, connecting the solar panel to the USB power pins and the Meshtastic’s power connector to the LiPo connector is parallel. This seemed to work fine, but I was unsure about the whole arrangement. It’s output current is limited to 100 mA by default which may not have been enough to charge the LiPo and power the Heltec V3.
I put all of the bits inside of a sturdy latching box that I had laying around. I had also added some silica gel pouches in the box in hopes of mildly controlling moisture.
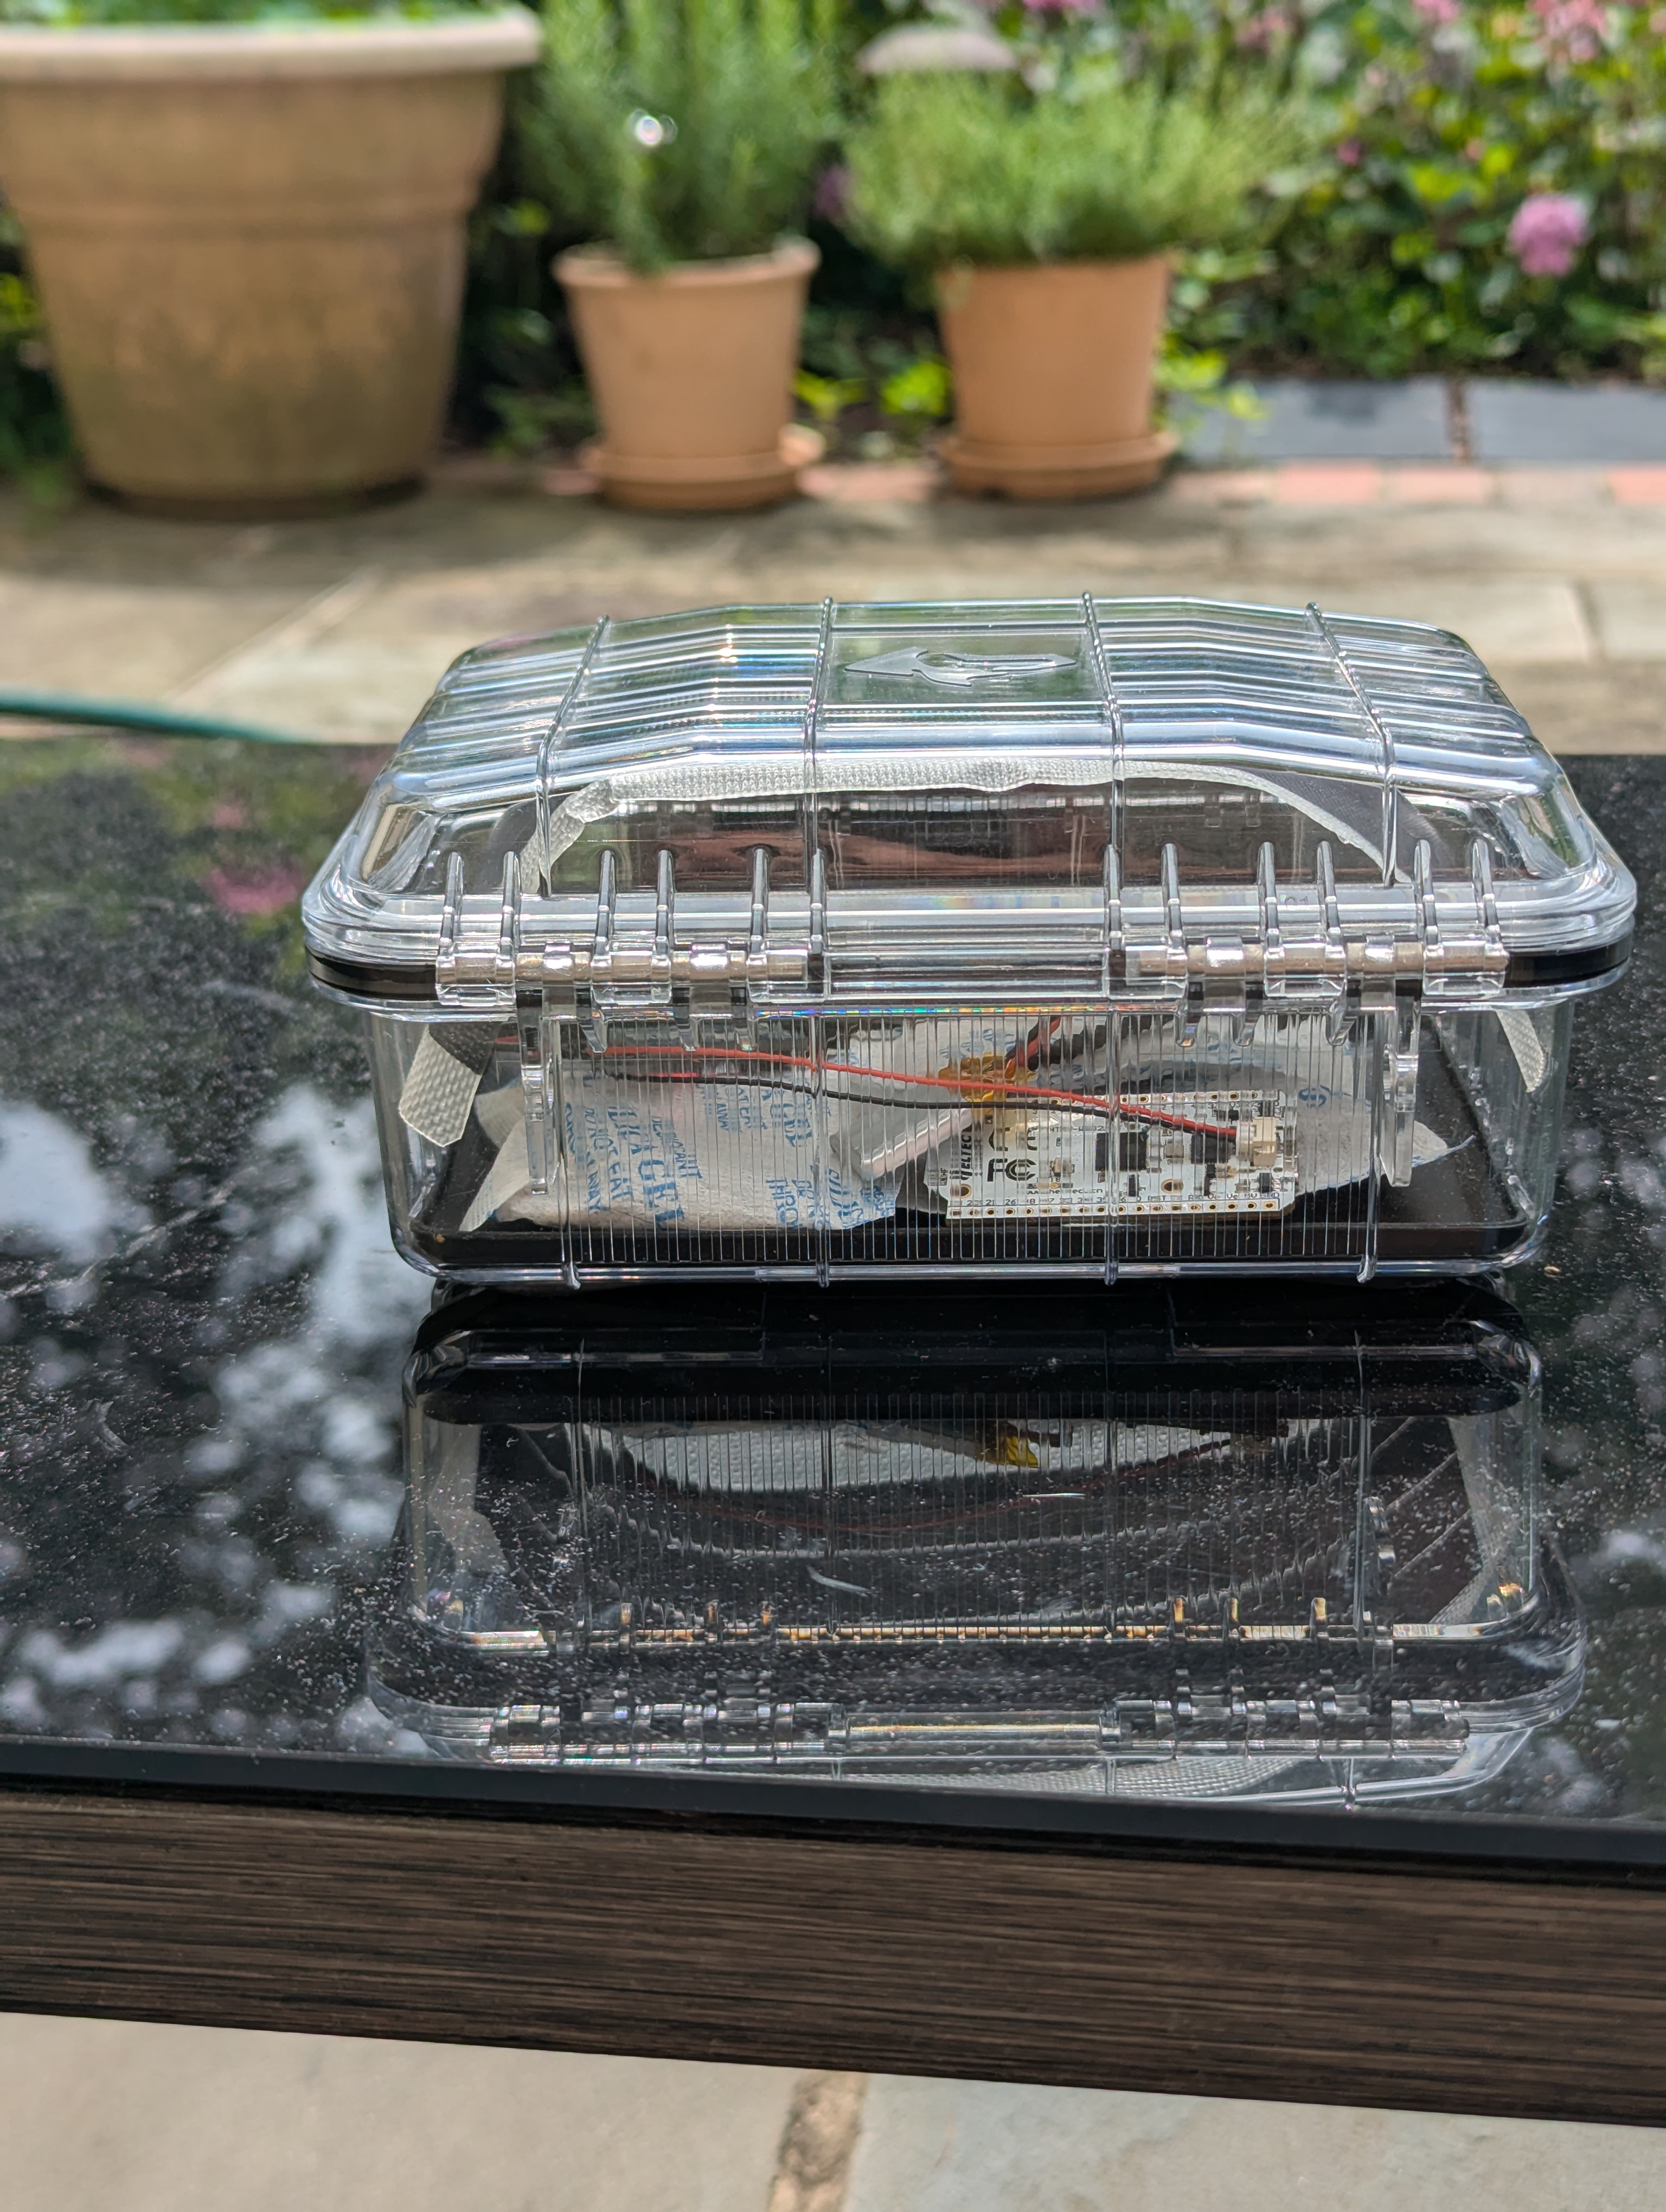

After leaving it out in the sun for a while, it did look like it was charging, or at least sustaining itself.
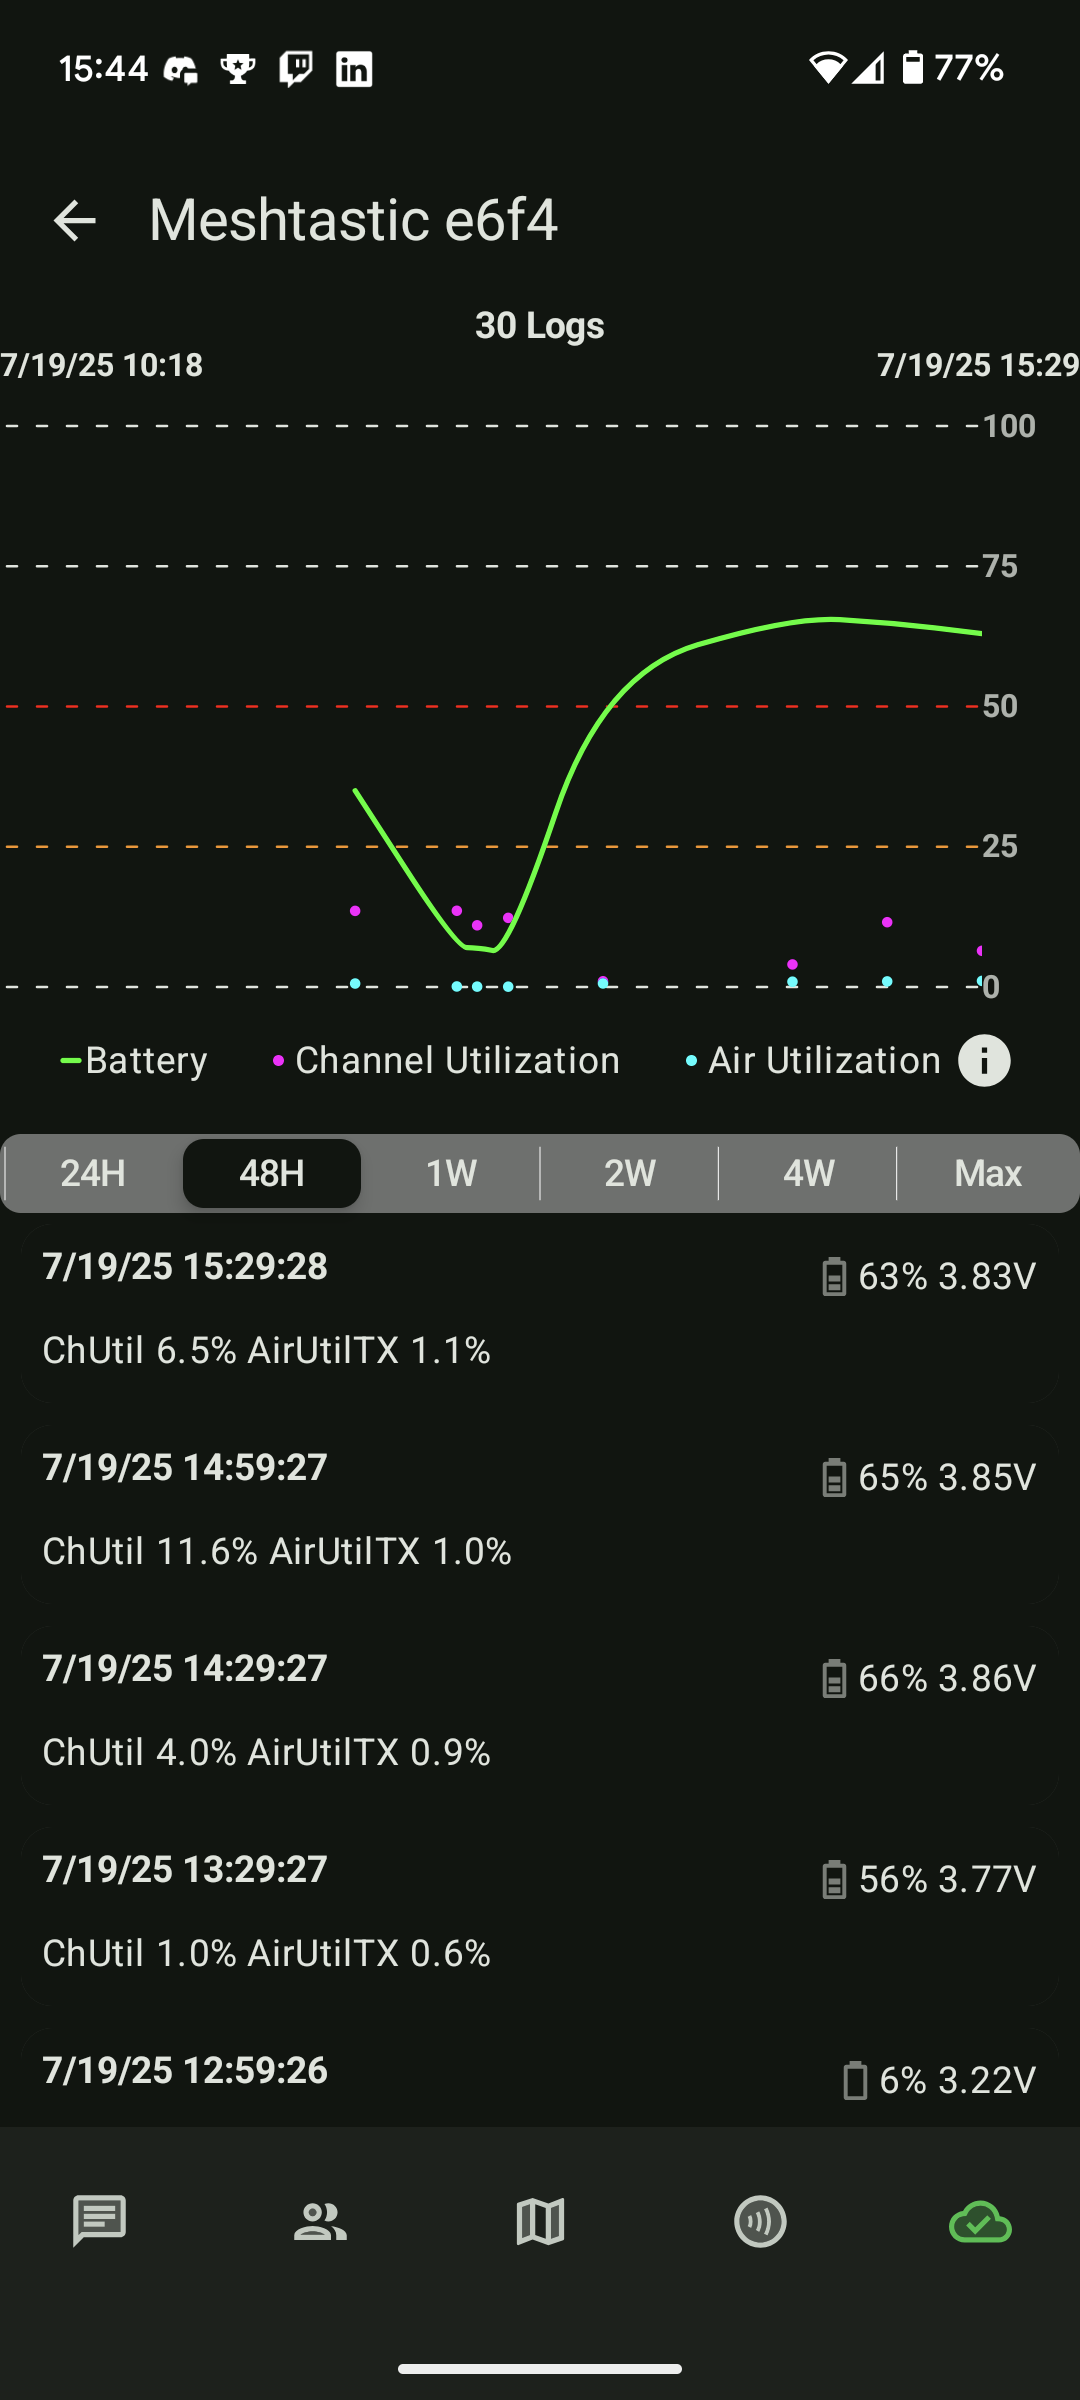
I decided to switch to this style of TP4056-based charger because it has separate output pins, which made me feel more confident in using it for this purpose, as well as having a lower minimum input voltage. I also changed the config somewhat in hopes of making the battery last a bit longer. After disabling bluetooth I enabled power saving mode and switched the Role to “Client Mute”, as this chart shows it to be one of the modes with the lowest power draw.
After leaving this overnight and out during a partly-cloudy day, it was apparent that not only was it powering the radio, but it was actually charging the battery.
I fear that the temperature inside the sealed box got too high and messed up the Heltec V3 slightly, because I have been having trouble with the remote admin on it. Primarily, I have been trying to change the device statistics telemetry delay, changing it from 1800 seconds to 900 seconds, but it never seems to save my changes. I may just need to re-flash the firmware on that module again, but I am not sure. I think that the temperature inside the box hasn’t gotten too far above 100°F, but it has been baking in the sun. All of the components are internal to the box, including the solar panel which probably absorbs a fair amount of heat. After trying to change the config it seemed like I didn’t get telemetry data as often, although my phone was disconnected from the base station for multiple periods throughout that day. I don’t know if the phone needs to be connected to the Heltec V3 that is receiving the data for the data to be recorded. On the positive side, the box did prove its waterproofing capabilities as it got rained on and the electronics are still completely bone dry.
Overall, I was surprised by how well it seemed that the small flexible solar panel was able to power the radio module, however I don’t really picture myself leaving the system out long term. I am not confident that the box is correctly suited for long term outdoor usage. While it will stand up to water and some physical damage, I am not confident that it won’t yellow or worse in the sun. Also, I think it would be wise to monitor the temperature inside the box. If I was adding sensors, I think a lux meter would also be nice so that one could tell how sunny it is on the solar panel. Also, a voltage/current sensor would be nice to monitor how much power just the solar panel is making and how much current is being drawn from it. But one of the biggest reasons I wouldn’t keep the box out is because it isn’t really a good Meshtastic node at the moment. It is in a pretty bad position, and I don’t think I would want to try and mount it elsewhere, such as on the roof, at the moment. However, I think this was a very fun and rewarding experiment. It was cool to see how I could cobble together components that I have to actually build a functional system. I could picture myself taking the lessons I learned from this project to build a more robust and long term solar Meshtastic installation.